Your phone just took an unexpected swim. Maybe it slipped into the sink, fell in the toilet, or got caught in a sudden downpour. That sinking feeling in your stomach is real, but panic won’t save your device. Knowing how to fix water damaged phone issues quickly can mean the difference between a full recovery and an expensive replacement.
The good news? Many water-damaged phones can be saved if you act fast and avoid common mistakes (yes, the rice trick is one of them). In this guide, we’ll walk you through the immediate steps that actually work, what to skip entirely, and how to tell when your phone needs professional attention. At Fyxters, we connect Canadians with vetted repair technicians who handle water damage daily, but first, let’s cover what you can do right now to give your phone the best chance of survival.
Before you start: safety and a quick damage check
Before you attempt to fix water damaged phone issues, your safety comes first. Water and electricity don’t mix, and a wet phone that’s still connected to power poses genuine risks. Taking a moment to assess the situation properly will protect both you and your device from further harm.
Never handle a water-damaged phone that’s plugged into a charger or connected to any power source.
Check for immediate safety risks
If your phone is plugged in when it gets wet, unplug the charger immediately from the wall socket, not from the phone itself. Your hands should be completely dry before touching anything electrical. Look for any signs of sparking, smoke, or unusual heat coming from the device. Should you notice any of these warning signs, place the phone in a safe, dry location away from flammable materials and avoid touching it until it’s completely cool and dry.
Assess the damage severity
Water damage varies dramatically depending on the type of liquid and how long your phone was submerged. Note these critical factors:
- Fresh water causes less immediate damage than salt water or sugary drinks
- Quick splashes are far more survivable than full submersion
- IP-rated phones (IP67 or IP68) have built-in water resistance that improves survival odds
Check whether your phone has an IP rating printed on its packaging or in the settings menu. Take note of exactly what happened: the liquid type, duration of exposure, and whether the phone was on or off when it got wet. This information helps you decide which recovery steps to take and whether professional repair is necessary.
Step 1. Shut it down and remove what you can
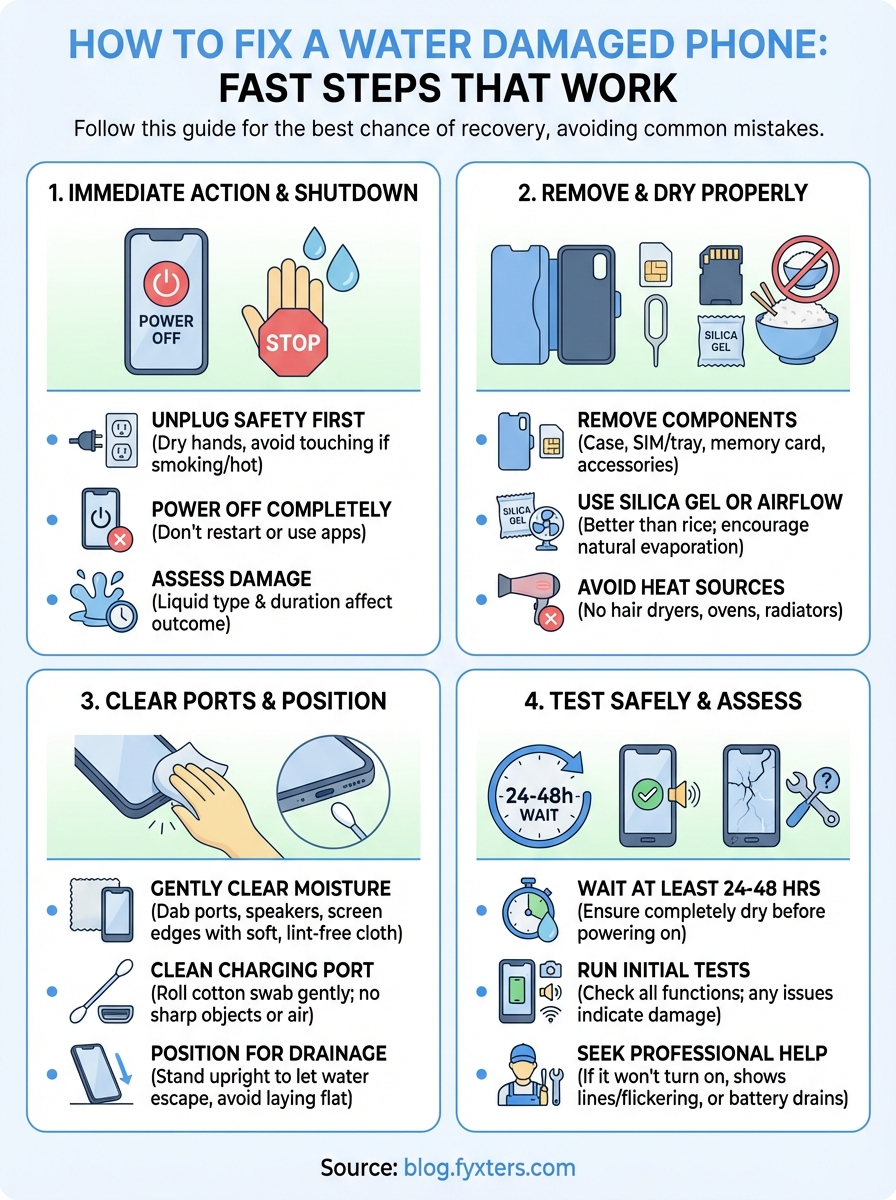
The very first action when learning how to fix water damaged phone issues is to power down the device and remove anything that can trap moisture. Every second your phone stays on while wet increases the risk of short circuits that can cause permanent damage to the internal components.
Power off immediately
Press and hold the power button until your phone completely shuts down. Don’t attempt to open apps, take photos of the incident, or send messages. If your phone has already turned itself off due to water exposure, leave it off. Trying to restart it forces electricity through potentially wet circuits, which can fry the logic board instantly.
The most common mistake people make is turning the phone back on too soon to check if it still works.
Remove external components
Take off your phone case immediately, as it traps moisture against the device. Remove these items carefully:
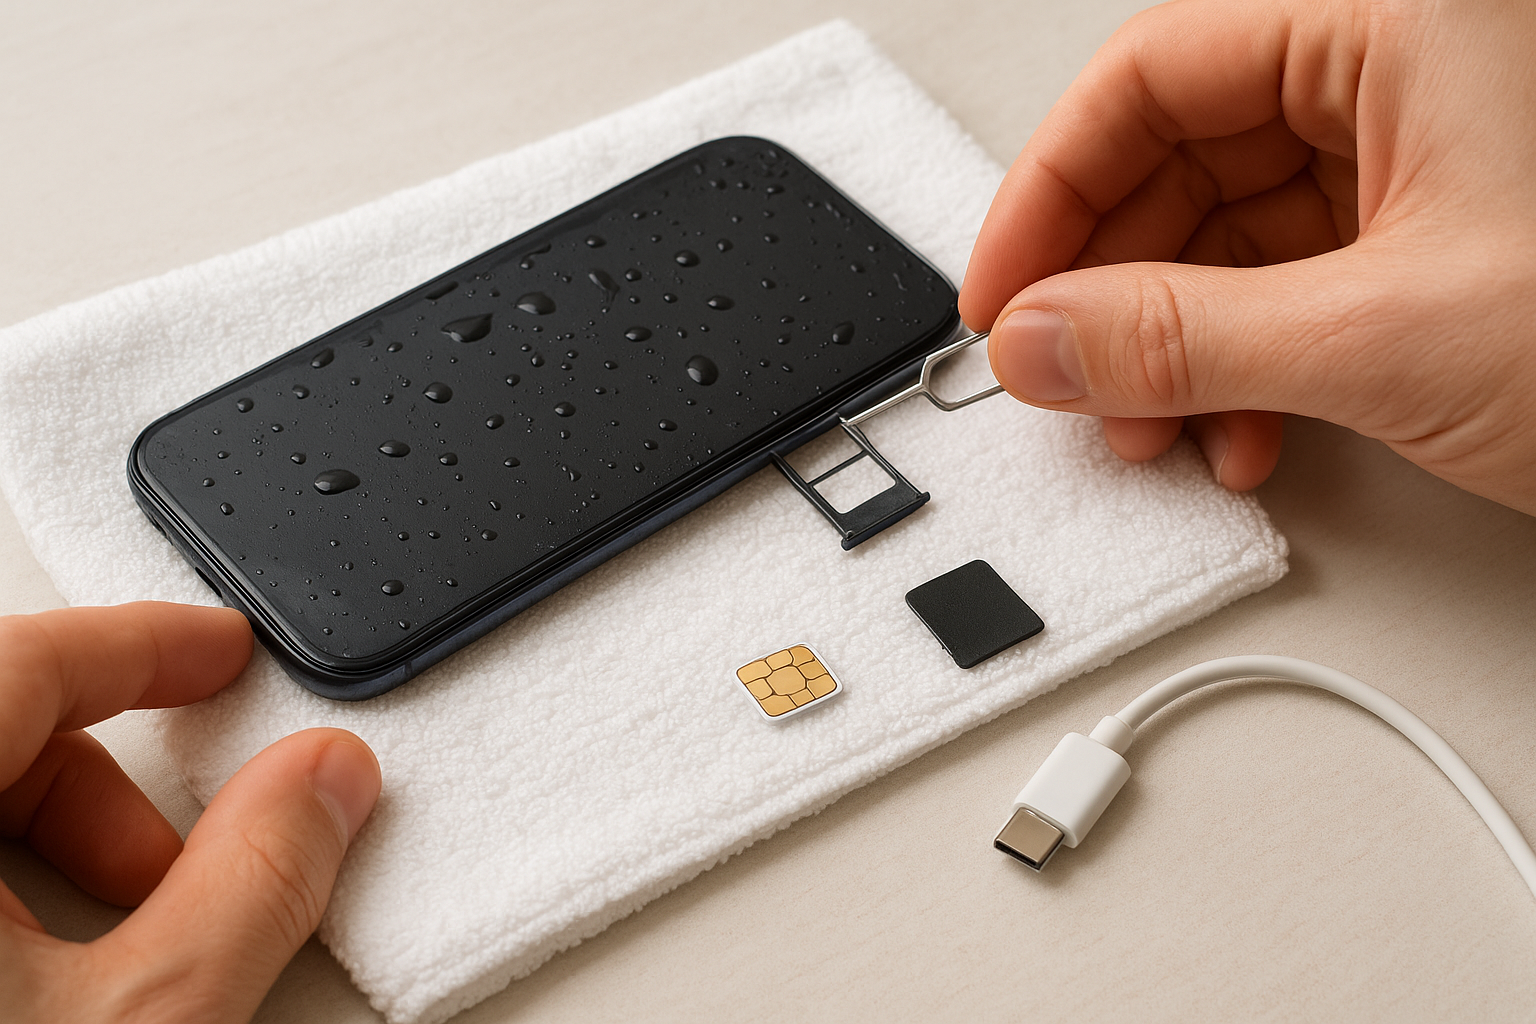
- SIM card and tray (use the ejector tool or a paperclip)
- Memory card if your phone has one
- Any attached cables, dongles, or accessories
Place these components on a dry towel separately. Removing them creates airflow pathways that help moisture escape from internal areas. Don’t remove the battery yourself if it’s built in, as opening modern phones requires specialised tools and can void warranties.
Step 2. Dry it the right way, not with rice
The rice trick is a myth that won’t save your phone and might actually make things worse. Rice grains can get stuck in charging ports and headphone jacks, creating new problems. When you’re figuring out how to fix water damaged phone damage, proper drying techniques make all the difference. Your goal is to create an environment where moisture can evaporate naturally without introducing dust, debris, or heat damage.
Use silica gel or just air
Place your phone in an area with good airflow and low humidity. If you have silica gel packets (those small pouches found in shoe boxes or electronics packaging), place several around the phone in a container. Silica gel actively absorbs moisture far more effectively than rice ever could.
Don’t use heat sources like hair dryers, ovens, or radiators, as high temperatures can melt internal components and crack the screen.
Alternatively, position the phone near a gentle fan or in front of an air conditioning vent. The moving air helps moisture evaporate without applying dangerous heat levels.
Position for drainage
Stand your phone upright or prop it at an angle that lets water drain out of the ports rather than deeper into the device. Avoid laying it flat on either side, as this traps liquid inside. Leave the phone in this position for at least 24 to 48 hours before attempting to power it on, even if it appears dry on the outside.
Step 3. Clear moisture from ports, speakers, and screen
Water doesn’t just sit on the surface of your phone. It seeps into charging ports, speaker grilles, and the tiny gaps around your screen. These hidden pockets of moisture can cause corrosion and connectivity problems days or weeks after the initial incident. Clearing these areas properly is crucial when learning how to fix water damaged phone damage effectively.
Use gentle absorption techniques
Take a soft, lint-free cloth or paper towel and gently dab around all openings and edges. Focus on these specific areas:
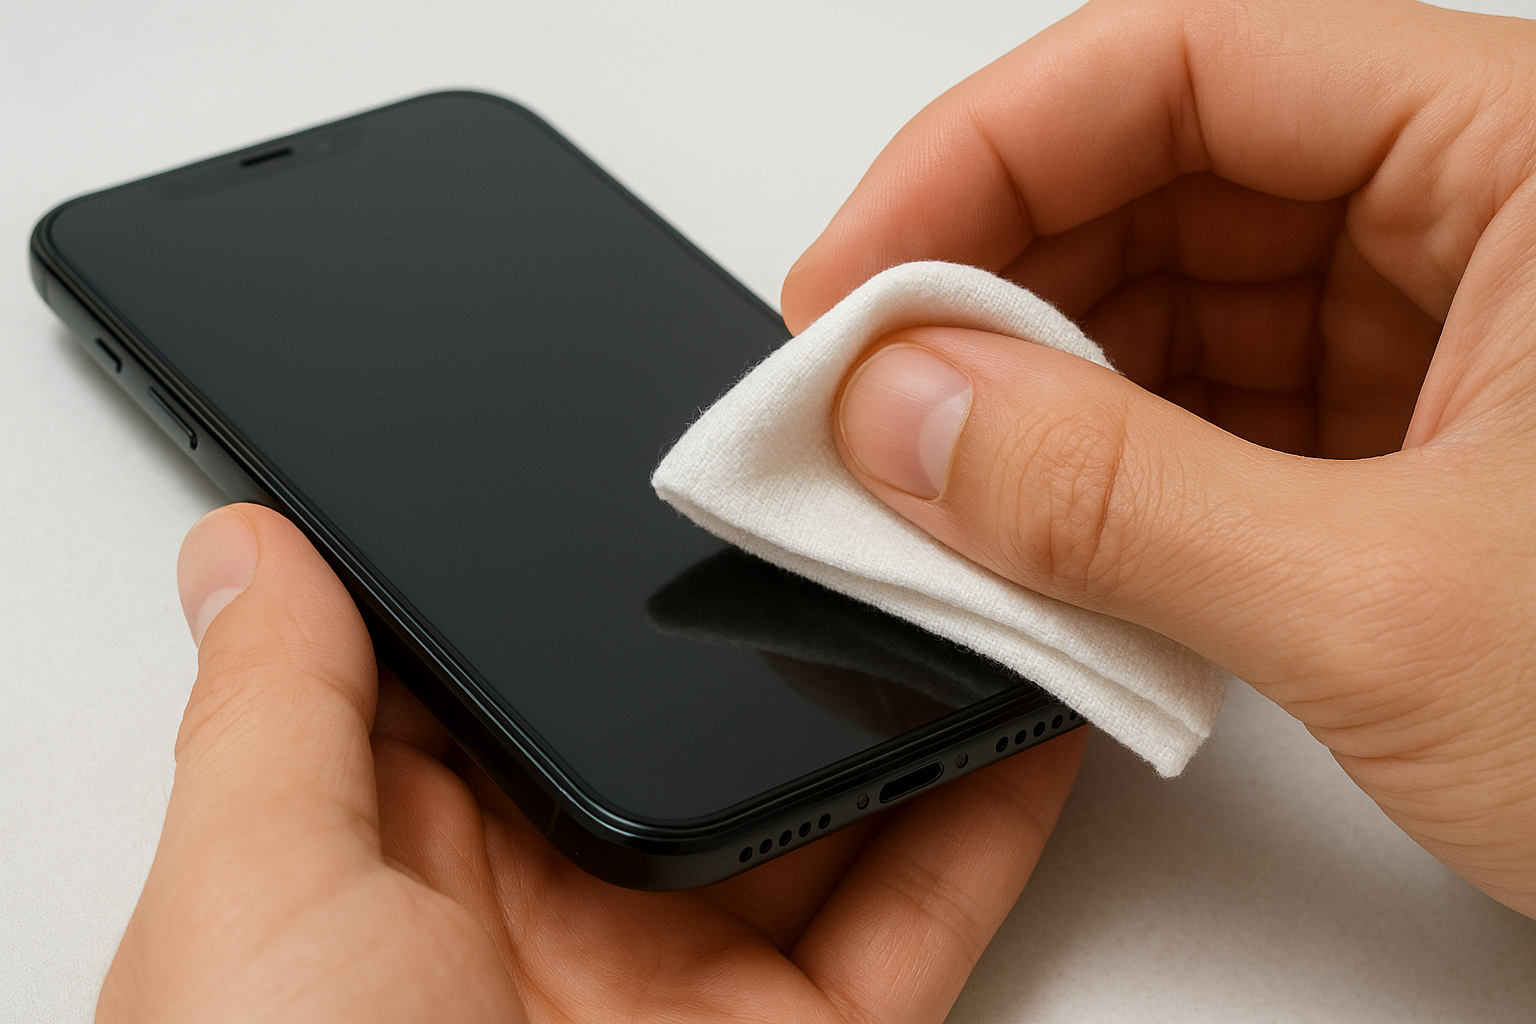
- Charging port (Lightning or USB-C)
- Headphone jack if your phone has one
- Speaker grilles on the top and bottom
- Camera lenses and flash
- Physical buttons and switches
Press the cloth lightly into each port opening to absorb standing water, but don’t push hard or insert anything deep inside. You can also use a cotton swab for the charging port, rolling it gently around the edges to soak up moisture without leaving fibers behind.
Never insert sharp objects, compressed air, or vacuum cleaners into your phone’s ports, as these can damage delicate internal components.
Check the screen edges
Run your fingertip along the seam where the screen meets the frame. Moisture often collects here and slowly works its way inside. Wipe this area thoroughly with your cloth, applying gentle pressure to draw out trapped water.
Step 4. Test safely and decide if you need a technician
After waiting at least 24 to 48 hours for your phone to dry completely, you’re ready to test whether your efforts worked. This step determines if you’ve successfully learned how to fix water damaged phone issues on your own or if professional help is necessary. Approach this carefully, as testing too aggressively can cause damage that drying prevented.
Run initial power-on tests
Press and hold the power button for several seconds. If the phone starts normally, let it fully boot before testing any features. Check these functions in order:
- Screen responsiveness and touch accuracy
- Speaker and microphone quality during a test call
- Camera clarity and focus
- Charging port connection
- WiFi and mobile data connectivity
Any unusual behaviour during these checks indicates internal damage that won’t heal on its own.
Signs you need professional repair
Watch for these warning signals that require a qualified technician:
- Phone won’t power on after 48 hours of drying
- Screen displays lines, spots, or flickering
- Buttons stick or don’t respond
- Battery drains unusually fast
- Charging port refuses to recognise cables
Corrosion develops inside water-damaged phones over time, even if they seem fine initially.
Fyxters connects you with vetted repair technicians across Canada who specialise in water damage recovery and can assess internal components your eyes can’t reach.
What to do next
You now know how to fix water damaged phone issues using methods that actually work. The key takeaways are simple: power off immediately, skip the rice, dry properly for 24 to 48 hours, and test carefully before assuming everything’s fine. These steps give your device the best chance of recovery without causing additional damage that expensive repairs can’t reverse.
If your phone still shows problems after following this guide, don’t wait for corrosion to set in. Professional water damage repair addresses internal issues you can’t see or fix at home, including logic board cleaning and component replacement. Fyxters connects you with vetted technicians across Canada who can assess the damage accurately, clean corroded components, and restore your phone to working condition with a service guarantee. Visit the Fyxters blog for more repair guides and device maintenance tips that keep your smartphones running longer.